
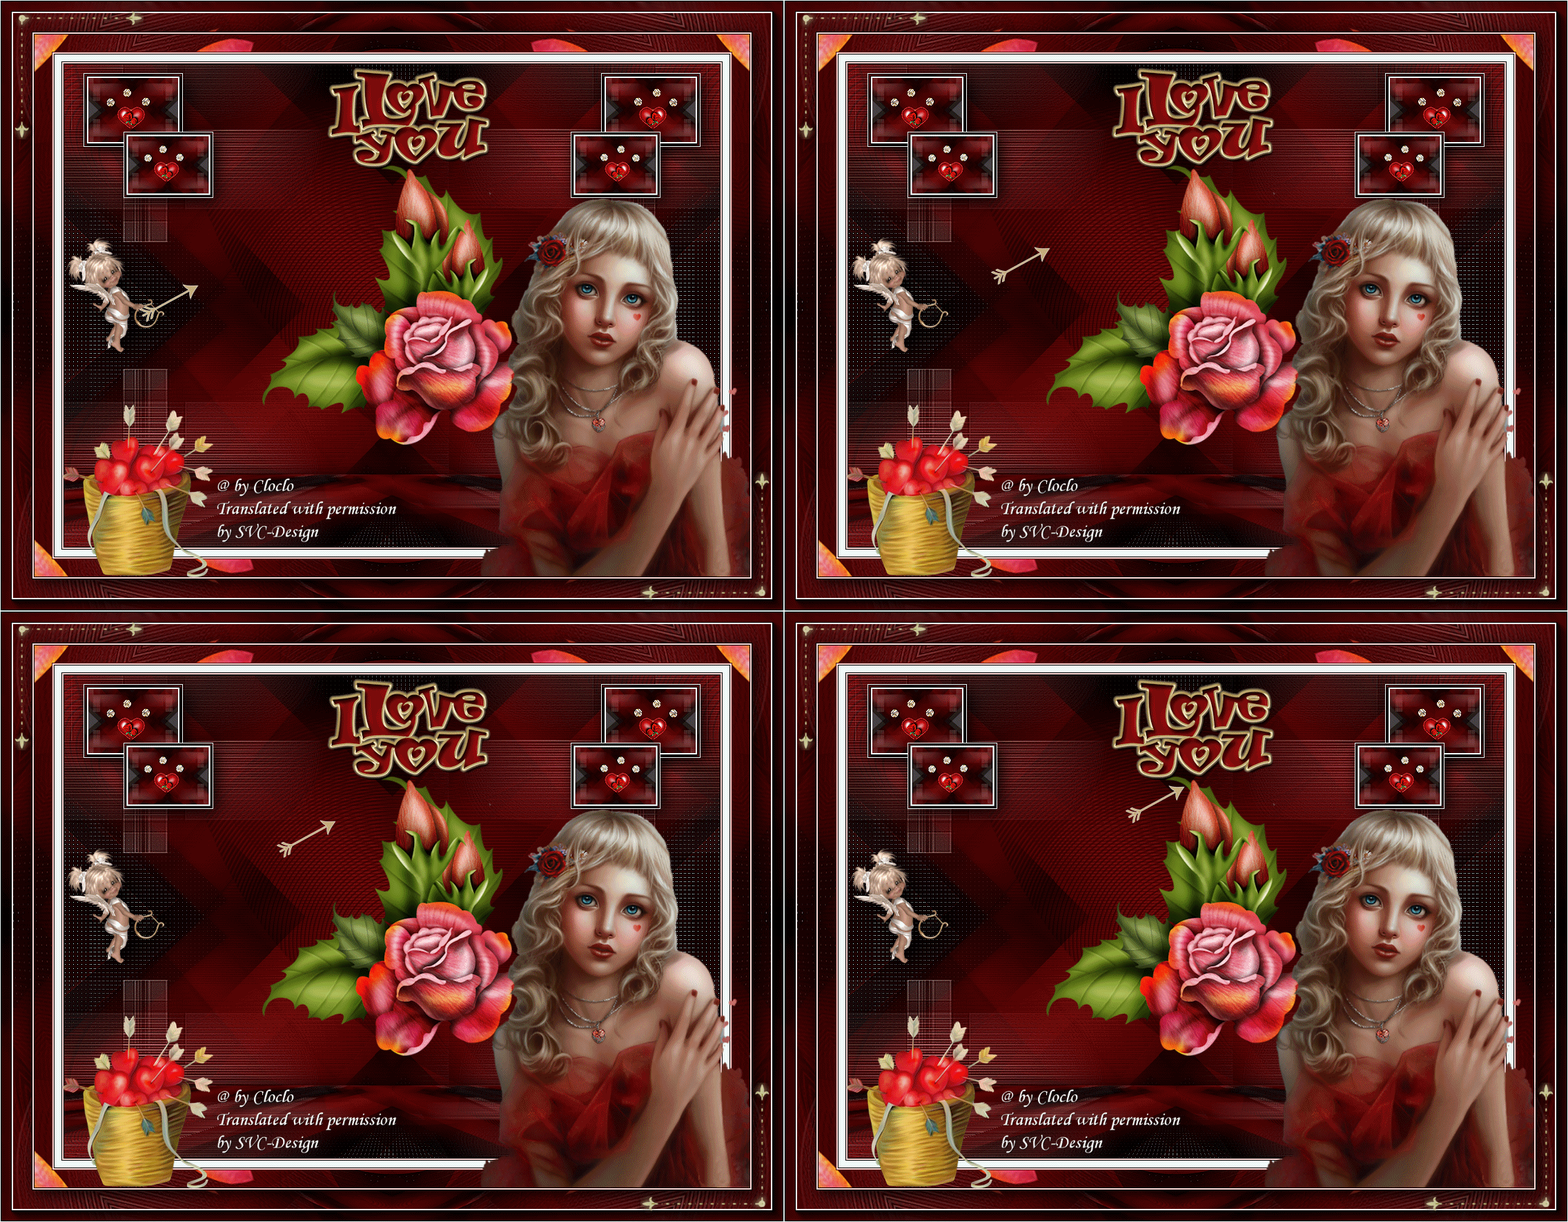
This lesson is made with PSPX9
But is good with other versions.
© by SvC-Design

Materialen Download :
Here
******************************************************************
Materials:
ange_Cloclo.png
coin_Cloclo.png
deco_Cloclo.png
deco_Cloclo1.png
deco_Cloclo2.png
fleche_Cloclo.png
panier.png
rose.png
selection_Cloclo.PspSelection
texte_Cloclo.png
tube.png
Watermark_Pour tuto.png
******************************************************************
Plugin:
Plugins - <I.C.NET Software> Filters Unlimited 2.0 - Tile & Mirror -Quadrant Mirror
Plugins - Carolaine And Sensibility - CS-LDots
Plugins - Toadies - What Are You?
Plugins - MuRa's Filters Meister - Perspective Tiling 1.1
Plugins - AAA Frame - FOTO FRAME
******************************************************************
color palette
:

******************************************************************
methode
When using other tubes and colors, the mixing mode and / or layer coverage may differ
******************************************************************
General Preparations:
First install your filters for your PSP!
Masks: Save to your mask folder in PSP, unless noted otherwise
Texture & Pattern: Save to your Texture Folder in PSP
Selections: Save to your folder Selections in PSP
Open your tubes in PSP
******************************************************************
We will start - Have fun!
Remember to save your work on a regular basis
******************************************************************
1.
Bring color 1 to the foreground / And to color background 4
Prepare a Linear gradient

2.
Open a new transparent image of 950 X 700 pixels
fill with the gradient
Adjust - blur - gaussian blur
Radius 30
plugins - Mehdi - Sorting Tiles
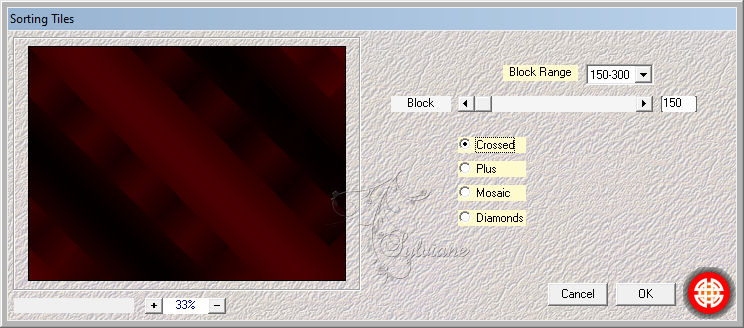
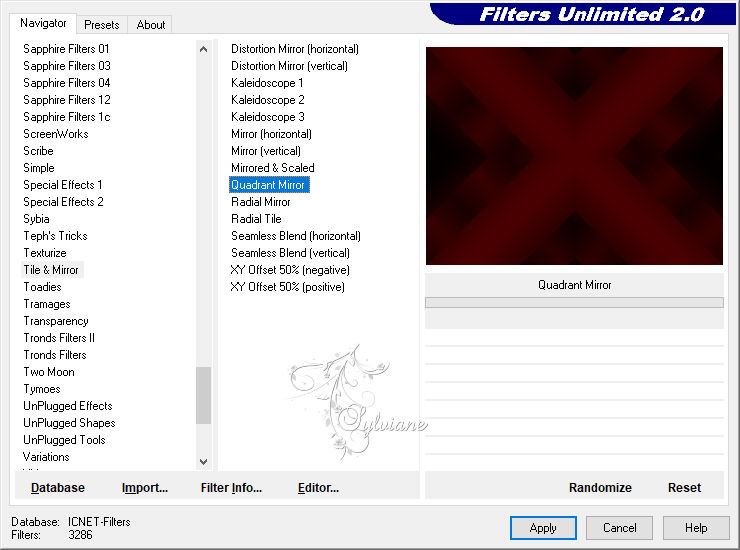
Plugins - <I.C.NET Software> Filters Unlimited 2.0 - Tile & Mirror -Quadrant Mirror
Effects - Image Effects - Seamless Tiling - Default
3.
Layer - New raster layer
Selection - Select all
Open deco_Cloclo.png
Edit - copy
Edit - paste in the selection
Blend Mode: Overlay
Selection - Select None
Effects - Image Effects - Seamless Tiling - Default
You position on the bottom
Selections - Load / Save - Load selection from disk - Cloclo1

Selections – Promote selections to layer
Layers – arrange – bring to top
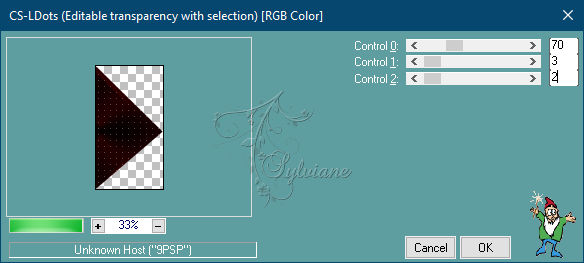
Plugins - Carolaine And Sensibility - CS-LDots
Selection - Select None
Plugins - Toadies - What Are You? ... - Default
Effects - Edge Effects - Enhance More
Effects - 3D Effects - Drop Shadow
2/2/100/22 / Black
4.
Layer - Duplicate
Image - Mirror – mirror Horizontal
Layers – merge – merge down
Layers - Duplicate
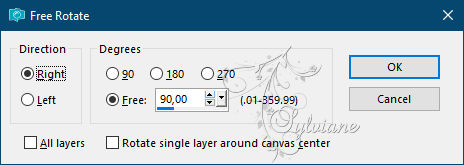
Image - Free Rotate
Layers – merge – merge down
Open deco_Cloclo1.png
Edit - copy
Edit - paste in the selection
Blend Mode: luminance (legacy)
Effects - Edge Effects - Enhance
Layers - Merge - Merge visible layers
Layers - Duplicate
Plugins - MuRa's Filters Meister - Perspective Tiling 1.1
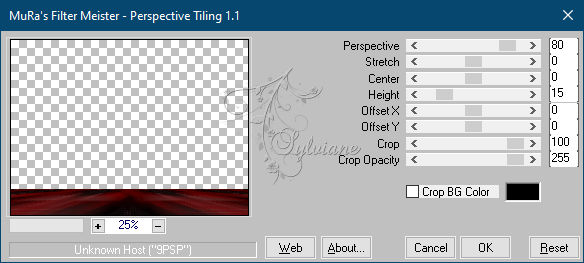
Effects - 3D Effects - Drop Shadow / 5/5/100/33 / Black
5.
activate the bottom layer
Edit - copy
edit - paste as a new image
Stay on this layer
Image - Resize to 15% All layers checked
Plugins - AAA Frame - FOTO FRAME
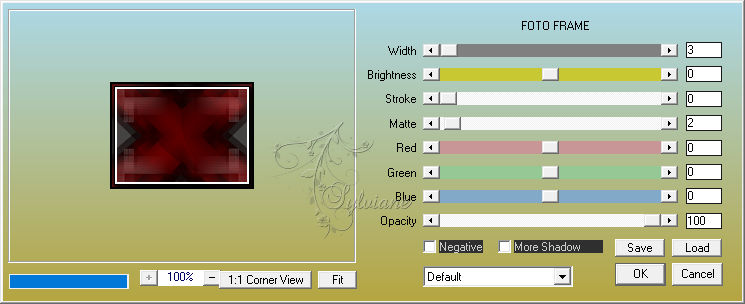
Image - Add Borders – 1pixel – color:#ffffff
Edit - copy
Go back to your original tag
Edit - Paste as new layer
Activate selection tool (Press K on your keyboard)
And enter the following parameters:
Pos X :28 – Pos Y :13
Press M.
Open deco_Cloclo2.png
Edit - copy
Edit - Paste as new layer
Place in small frame - See final
Layers – merge – merge down
Layers - Duplicate
Image - Resize to 90% - All layers unchecked
Activate selection tool (Press K on your keyboard)
And enter the following parameters:
Pos X :86 – Pos Y : 98
Press M.
6
Layers – merge – merge down
Layers - Duplicate
Image - Mirror – mirror Horizontal
Layers – merge – merge down
Effects - 3D Effects - Drop Shadow
5/5/100/33 / Black
Open rose.png
Edit - copy
Edit - Paste as new layer
Place well - See final
7.
Image - Add a border of 1 pixel - Color 4
Image - Add a border of 2 pixels - Color 3
Image - Add a border of 1 pixel - Color 1
Image - Add a border 10 pixel - Color 2
Image - Add a border of 1 pixel - Color 4
Image - Add a border of 2 pixels - Color 3
Image - Add a border of 1 pixel - Color 1
Selection - Select all
Image - Add a border of 25 pixels - Color 2
Fill with the starting gradient
Effects - Reflection Effects - Kaleidoscope
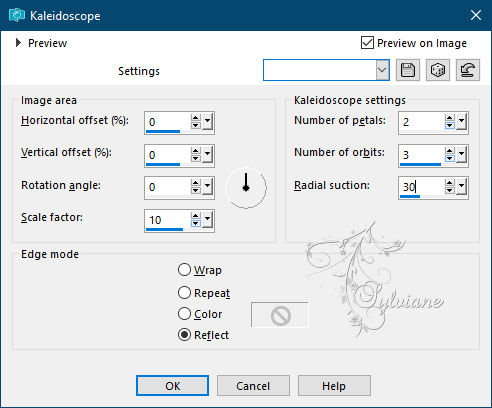
Adjust – scharpness – scharpen
Selection - Select None
Image - Add a border of 1 pixel - Color 4
Image - Add a border of 2 pixels - Color 3
Image - Add a border of 1 pixel - Color 1
Selection - Select all
Image - Add a border of 45 pixels - Color 1
Selection - Invert
Fill with the starting gradient
Effects - Reflection Effects - Kaleidoscope - As before

Selections - Invert
Effects - 3D Effects - Drop Shadow
5/5/100/33 / Black
Selection - Select None
Plugins - AAA Frame - FOTO FRAME
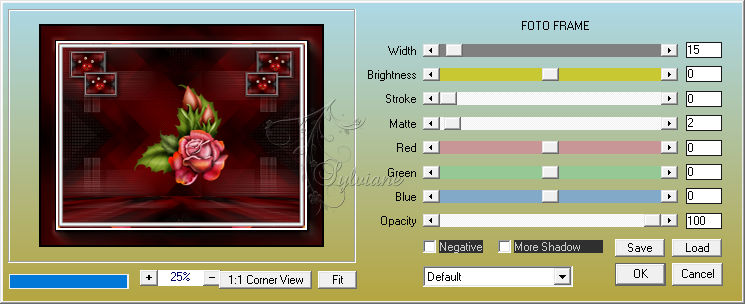
Image - Add a border of 1 pixel - color 2
8
Open texte_Cloclo.png
Edit - copy
Edit - Paste as new layer
Place well - See final
9
Open coin_Cloclo.png
Edit - copy
Edit - Paste as new layer
Do not move
10
Open panier.png
Edit - copy
Edit - Paste as new layer
Place at the bottom left
11
Open texte_Cloclo.png
Edit - copy
Edit - Paste as new layer
Place at top - Center well
12
Open ange_Cloclo.png
Edit - copy
Edit - Paste as new layer
Place left - See final
Sign your tag
Layer – merge – merge all (flatten)
Resize to 950 pixels wide / All layers checked
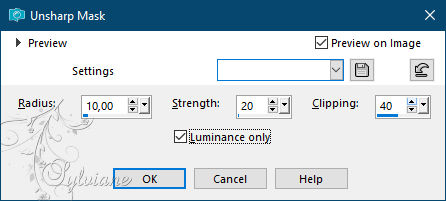
Adjust - sharpness - unsharp mask
For people who don't want to do entertainment
Open fleche_Cloclo.png
Edit - copy
Edit - Paste as new layer
Place well / See final
Save as JPG
13
For animation
Open fleche_Cloclo.png
Edit - copy
Edit - Paste as new layer
Place well / See final
Layers - duplicate
Advance the small arrow slightly
Layers - duplicate 3 more times to have 4 layers
Advance the small arrow slightly each time
To have this

Rename from the bottom to better locate you / Layers 1/2/3 / And 4
Close layers 2/3/4 /
You position on layer 1
Edit - Copy special - Copy merged
Open Animation Shop
Edit - Paste as New Animation
14
Return to your Corel
Close layer 1
You position on layer 2
Open it
Edit - Copy special - Copy merged
Open Animation Shop
Edit - Paste after active image
Repeat the same operation for the other two layers Close the layers
You position on the layer
Edit / Select all
Animation / Image properties / Update
Animation / Set the image property to 55 / View your animation
Save as GIF
Back
Copyright Translation © 2021 by SvC-Design